Google Analytics Nasıl Kurulur
Google Analytics, web trafiğini görüntülemek ve anlamak için kullanılır.
Ücretsizdir ve kullanımı kolaydır.
Birçok kullanım durumu için özelleştirebilirsiniz.
Kutunun dışında çalışır.
Kurulumu hızlıdır. Görüşlerinizi bugün alın!
Ücretsiz web sitemi oluştur ❯Google Analytics hakkında okumayı atlayın. Beni doğrudan ilk adıma götür. İlk adıma git
Google Analytics nedir
Google Analytics, bir web analizi çözümüdür.
Google tarafından geliştirilmiş ve desteklenmiştir.
En yeni sürümün adı Google Analytics 4'tür.
Hedef kitle, sayfa görünümleri, oturumlar ve demografi ve etkinlikler gibi verileri görüntülemek için kullanılabilir.
Google Analytics'i neden etkinleştirmelisiniz?
Daha iyi kararlar almak için web trafiğinizi anlayın.
Satış hunisini anlayın ve iyileştirin.
Deney yaparak öğrenin (örneğin, a/b testleri).
Google'ın Google Optimize adında başka bir çözümü var. Bu çözüm test için yapılmıştır.
Google Analytics kimler içindir?
Google Analytics, bir web sitesi olan herkes için yararlıdır.
Sitenizi kimin kullandığı ve siteyle nasıl etkileşime girdiği hakkında size bilgi verir.
Ek olarak, arayüzün anlaşılması kolaydır.
Hizmeti kullanmak ve hizmette gezinmek için bir analiz geçmişine ihtiyacınız yoktur.
Adım adım Google Analytics nasıl kurulur?
Google Analytics, Global Web Sitesi Etiketi (gtag.js) veya Google Etiket Yöneticisi olmak üzere iki şekilde kurulabilir .
En kolay yol, Global Web Sitesi Etiketini kullanmaktır.
Bu eğitimde Global Web Sitesi Etiketi yaklaşımı kullanılacaktır.
Hazırlıklar
Hangi kod düzenleyiciyi kullanacağınıza karar verin ve ortamınızı kurun.
W3Schools, W3Schools Spaces adlı kullanımı kolay bir kod düzenleyici oluşturmuştur . Kaydolun ve birkaç tıklamayla başlayın.
Ücretsiz başlayın ❯Kodu girmeye hazır olmak için index.html dosyanızı oluşturun .
Tüm kurulum. Hadi gidelim!
Google Analytics'i kurun: Küresel Web Sitesi Etiketi
1. Adım: Bir Google Analytics hesabı oluşturun
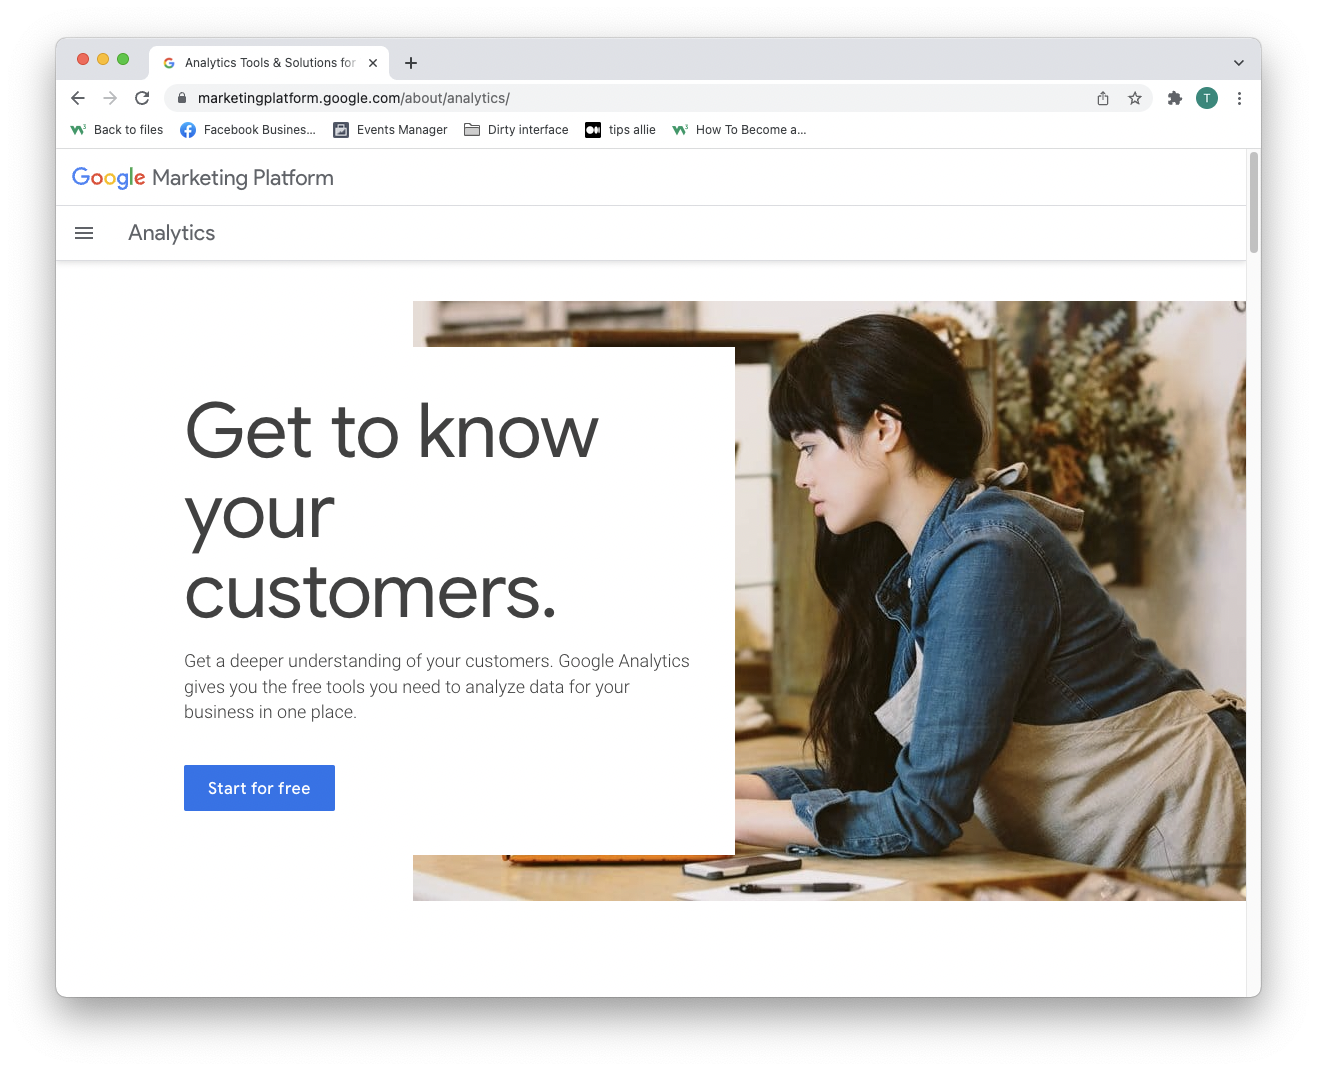
Analytics'e gidin: Bir hesap oluşturun veya Analytics'te oturum açın
Yukarıdaki paragraftaki bağlantı sizi Google Analytics açılış sayfasına götürür.
"Ücretsiz başla" düğmesini tıklayın.
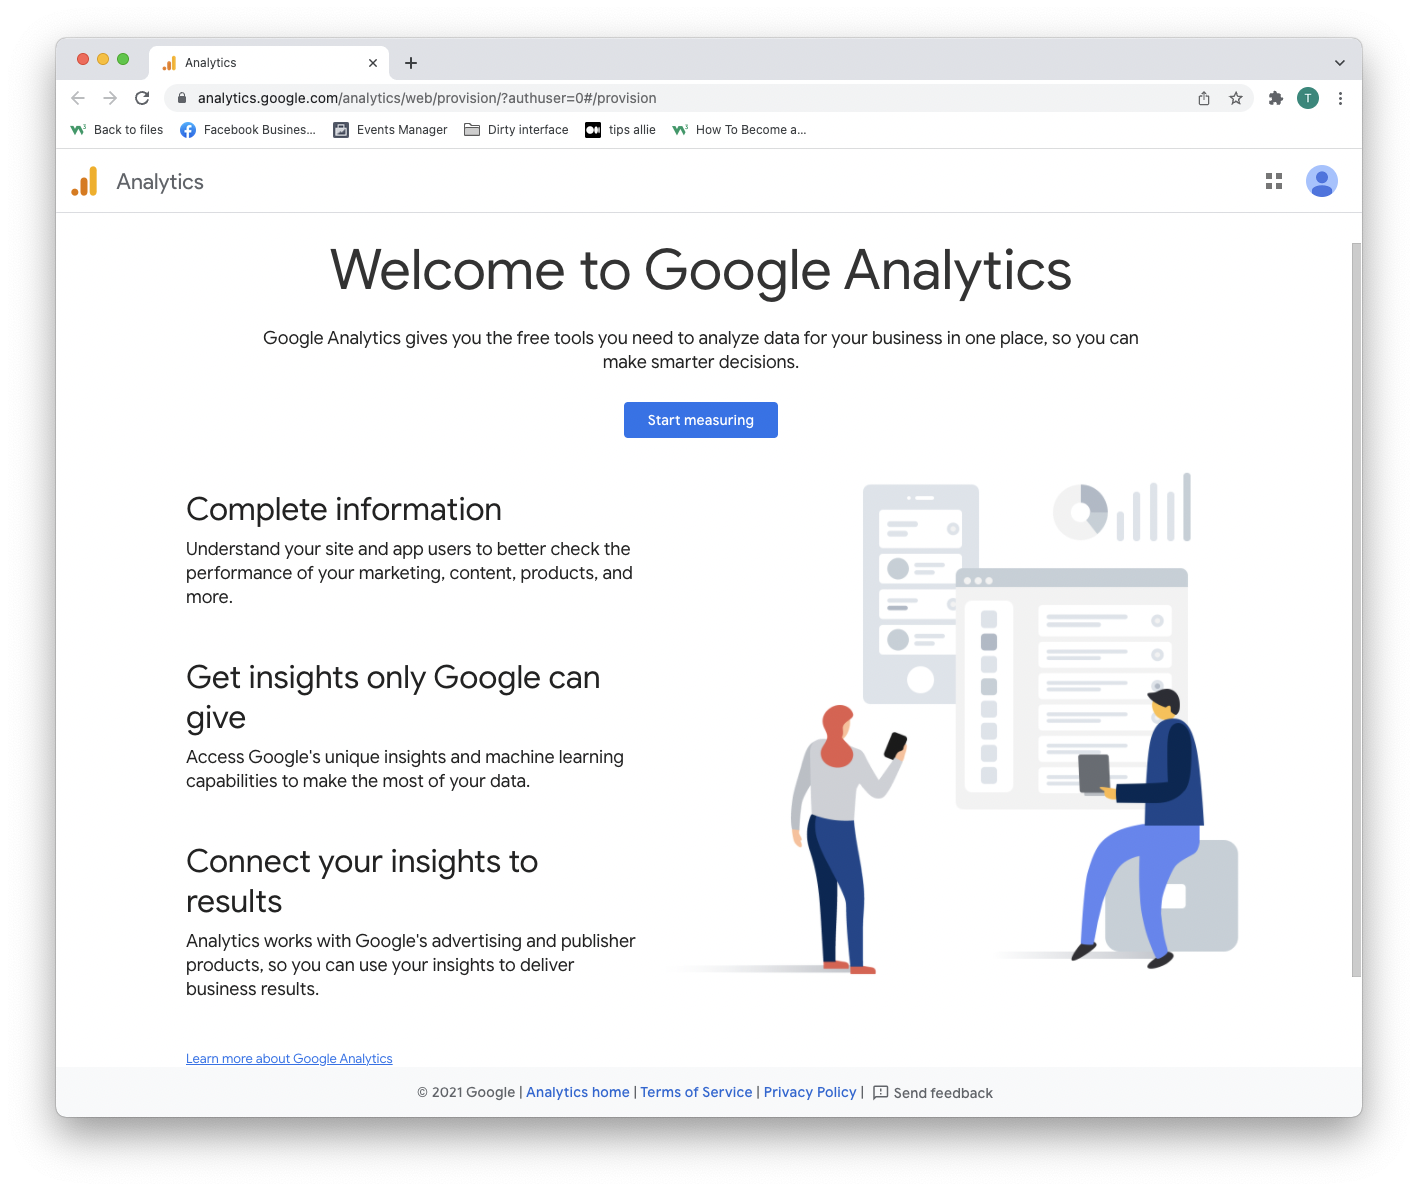
2. Adım: Karşılama sayfasına girin
Bir hesap oluşturduktan veya oturum açtıktan sonra çözüme hoş geldiniz.
Devam etmek için "Ölçümü başlat" düğmesine basın.
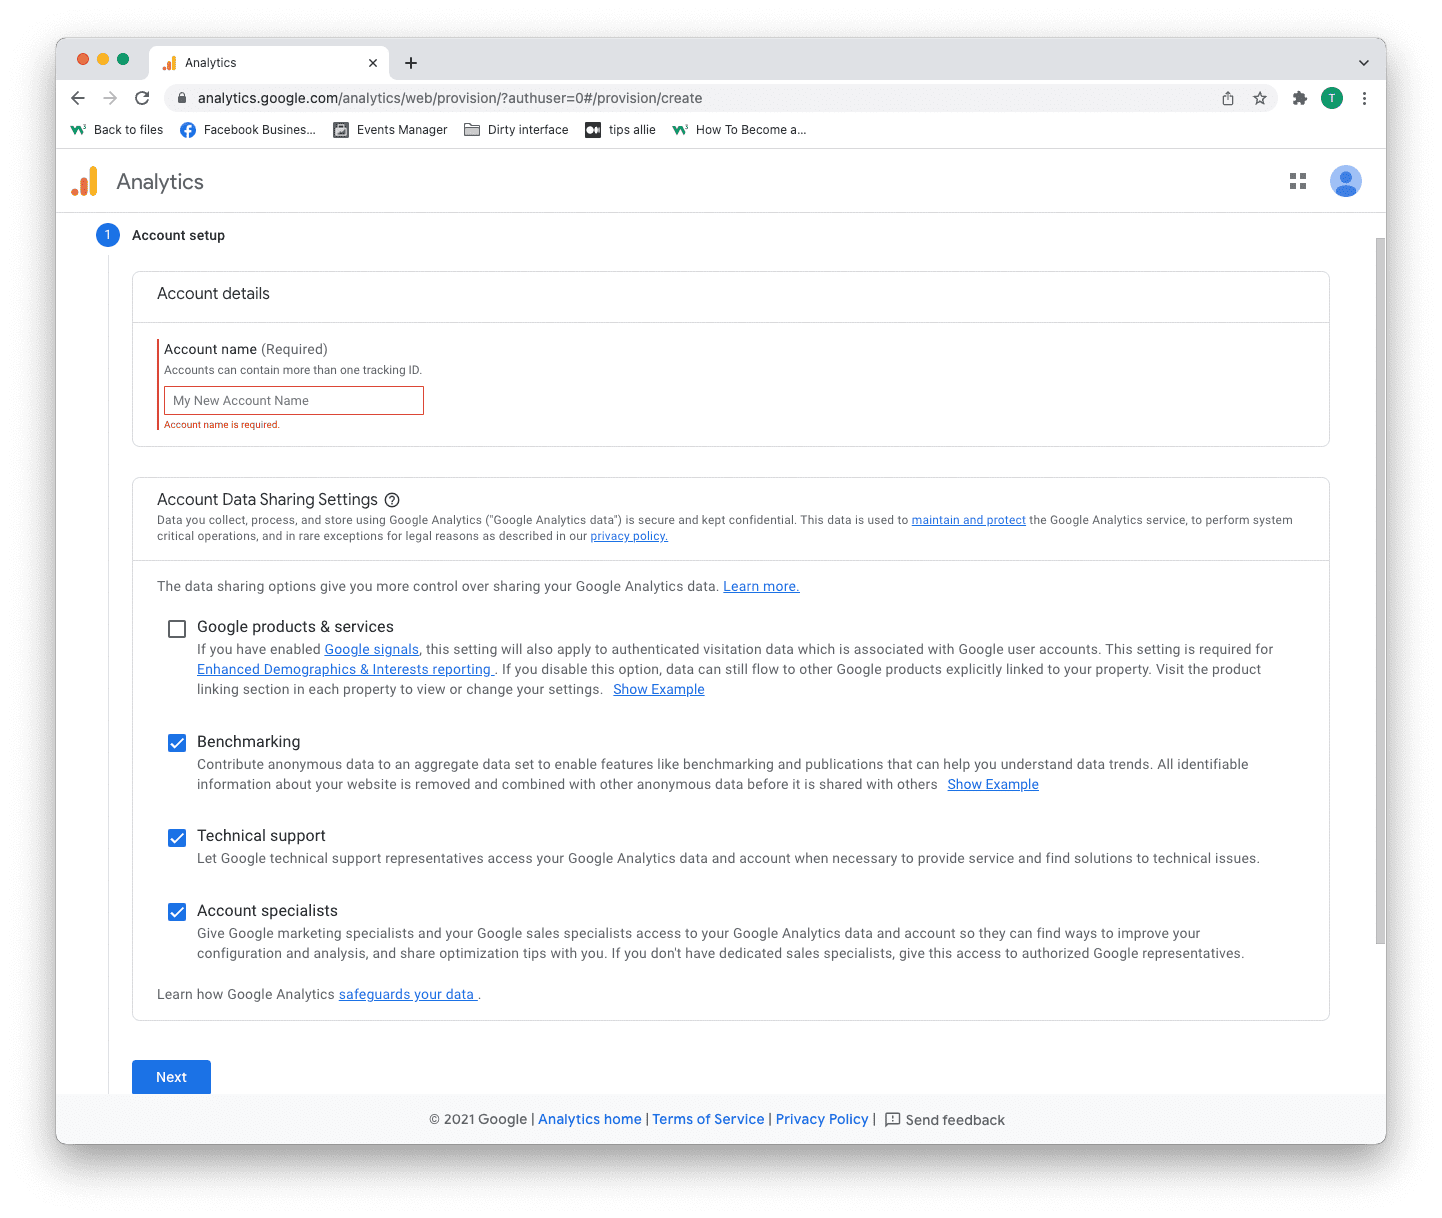
3. Adım: Hesap kurulumu
Burada vermen gereken iki karar var.
- Hesap adınızı girin.
- Hangi verileri paylaşmak istediğinize karar verin.
- "İleri" düğmesini tıklayın.
Bir hesabın birden fazla izleme kimliği olabilir. Bir hesapla birden fazla web sitesini takip edebilirsiniz.
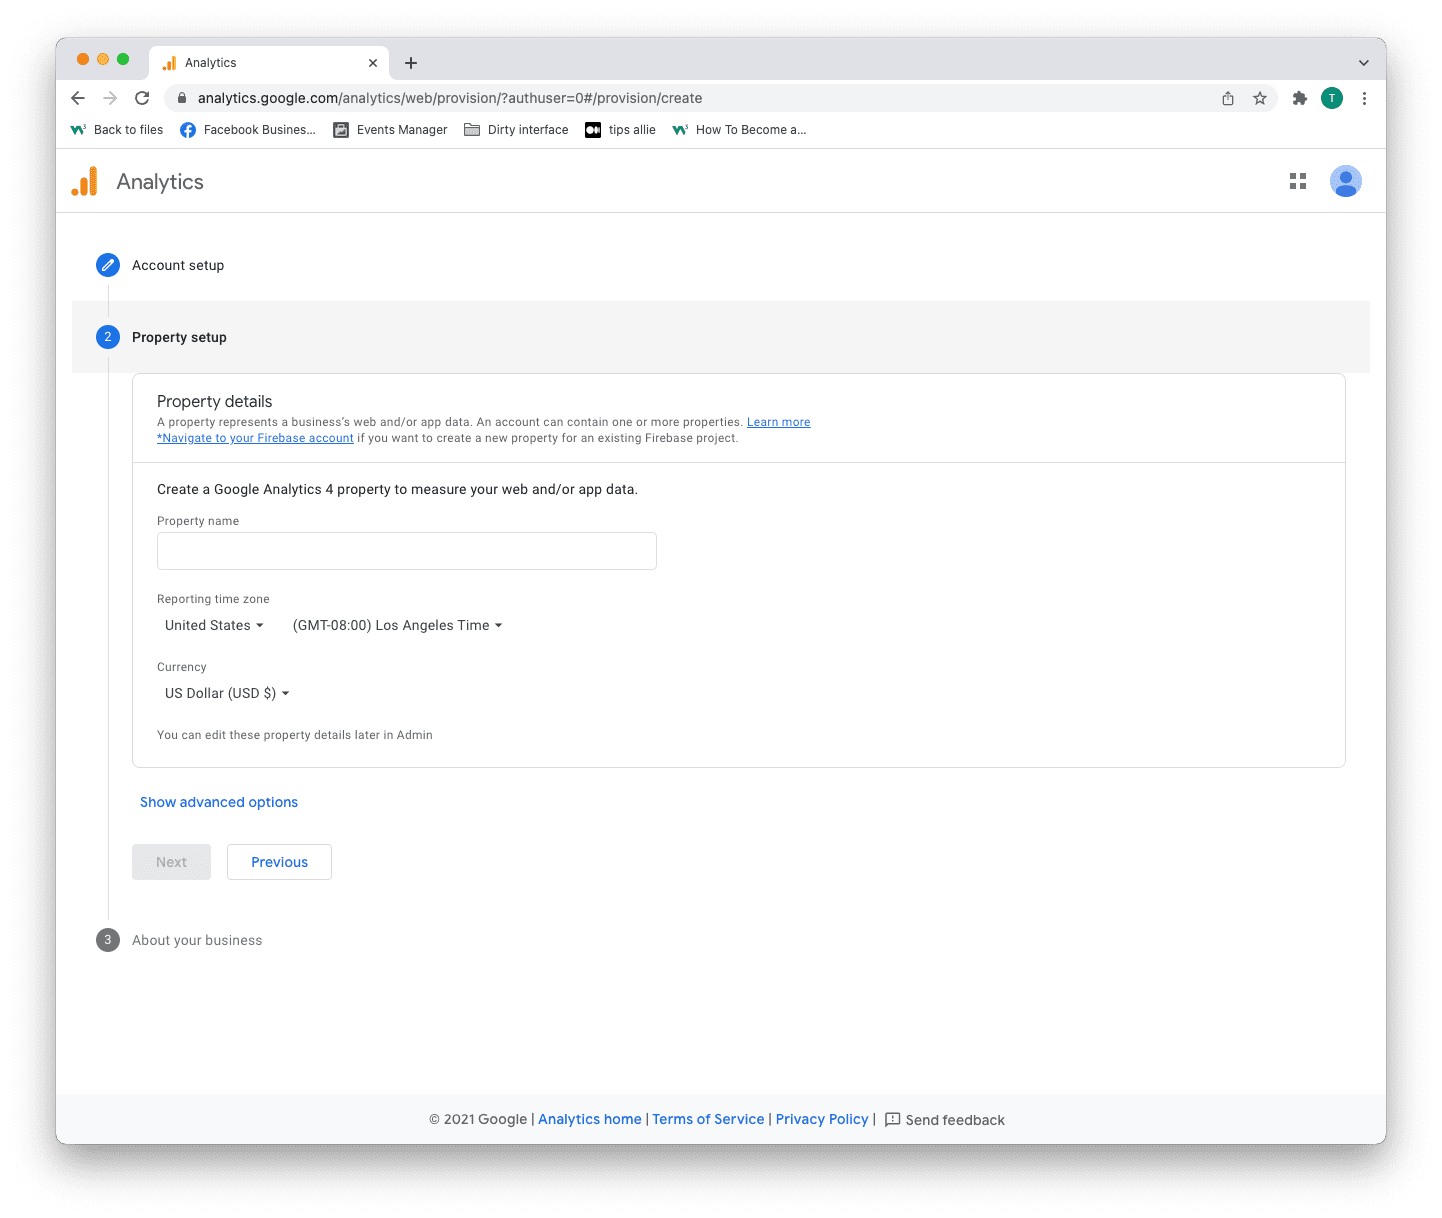
4. Adım: Mülk kurulumu
Mülkiyet, bir web sitesi, uygulama, bağlantı ağacı vb. gibi ölçtüğünüz hizmettir.
- Bir mülk adı girin.
- Saat diliminizi girin.
- Kullandığınız para birimini girin.
- "İleri" düğmesini tıklayın.
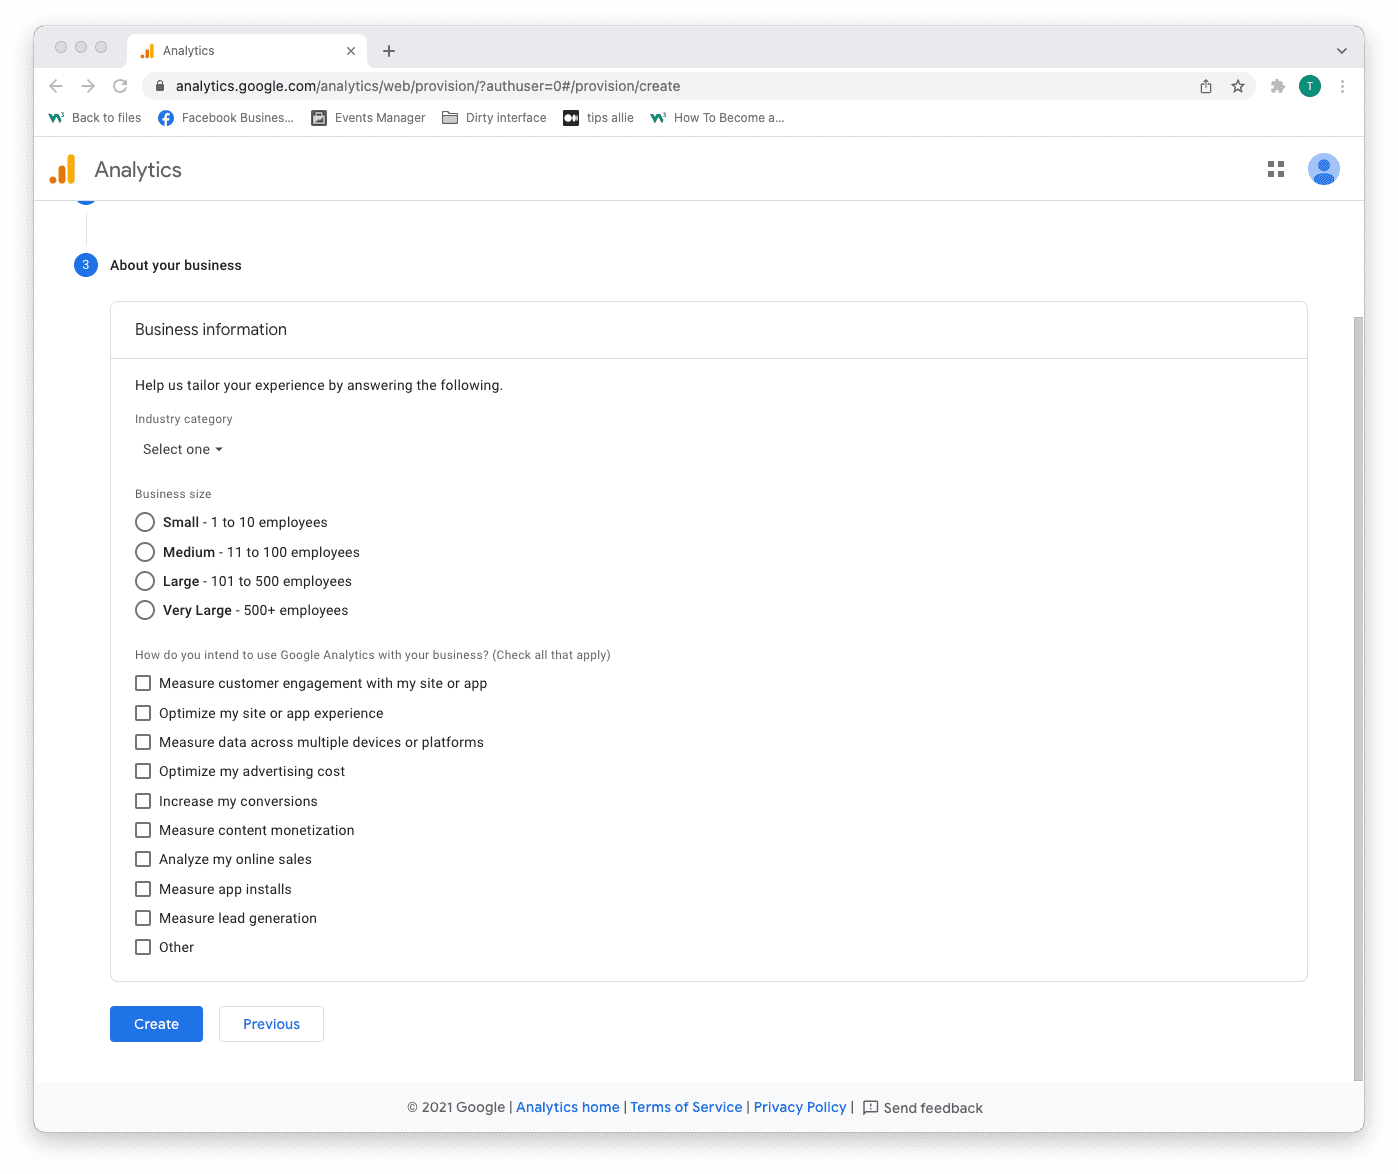
5. Adım: İşletme bilgilerini ekleyin
Analytics, deneyiminizi uyarlamak için bilgileri kullanır.
- Sektör kategorinizi seçin.
- İşletme boyutunu seçin.
- Tick the boxes for how you are planning to use Analytics.
- Click the "Create" button to proceed.
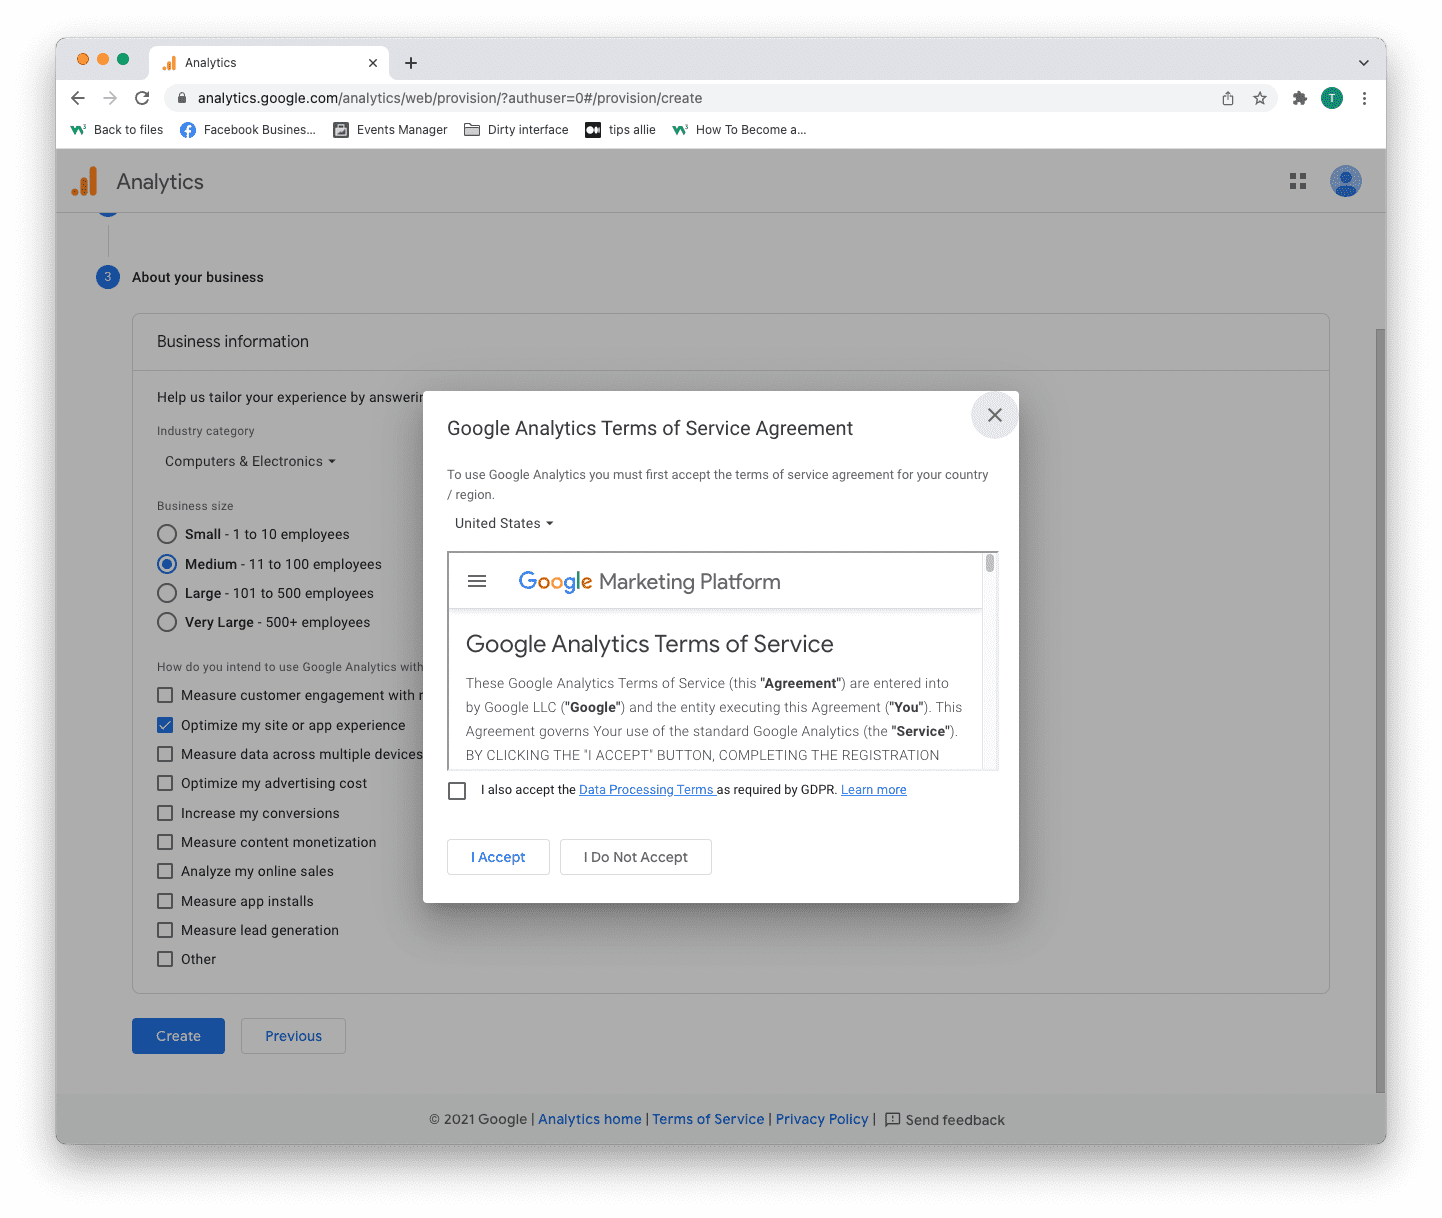
Step 6: Terms of Service Agreement
Read and understand the terms of service.
Tick the GDPR box and click the "I accept" button if you agree.
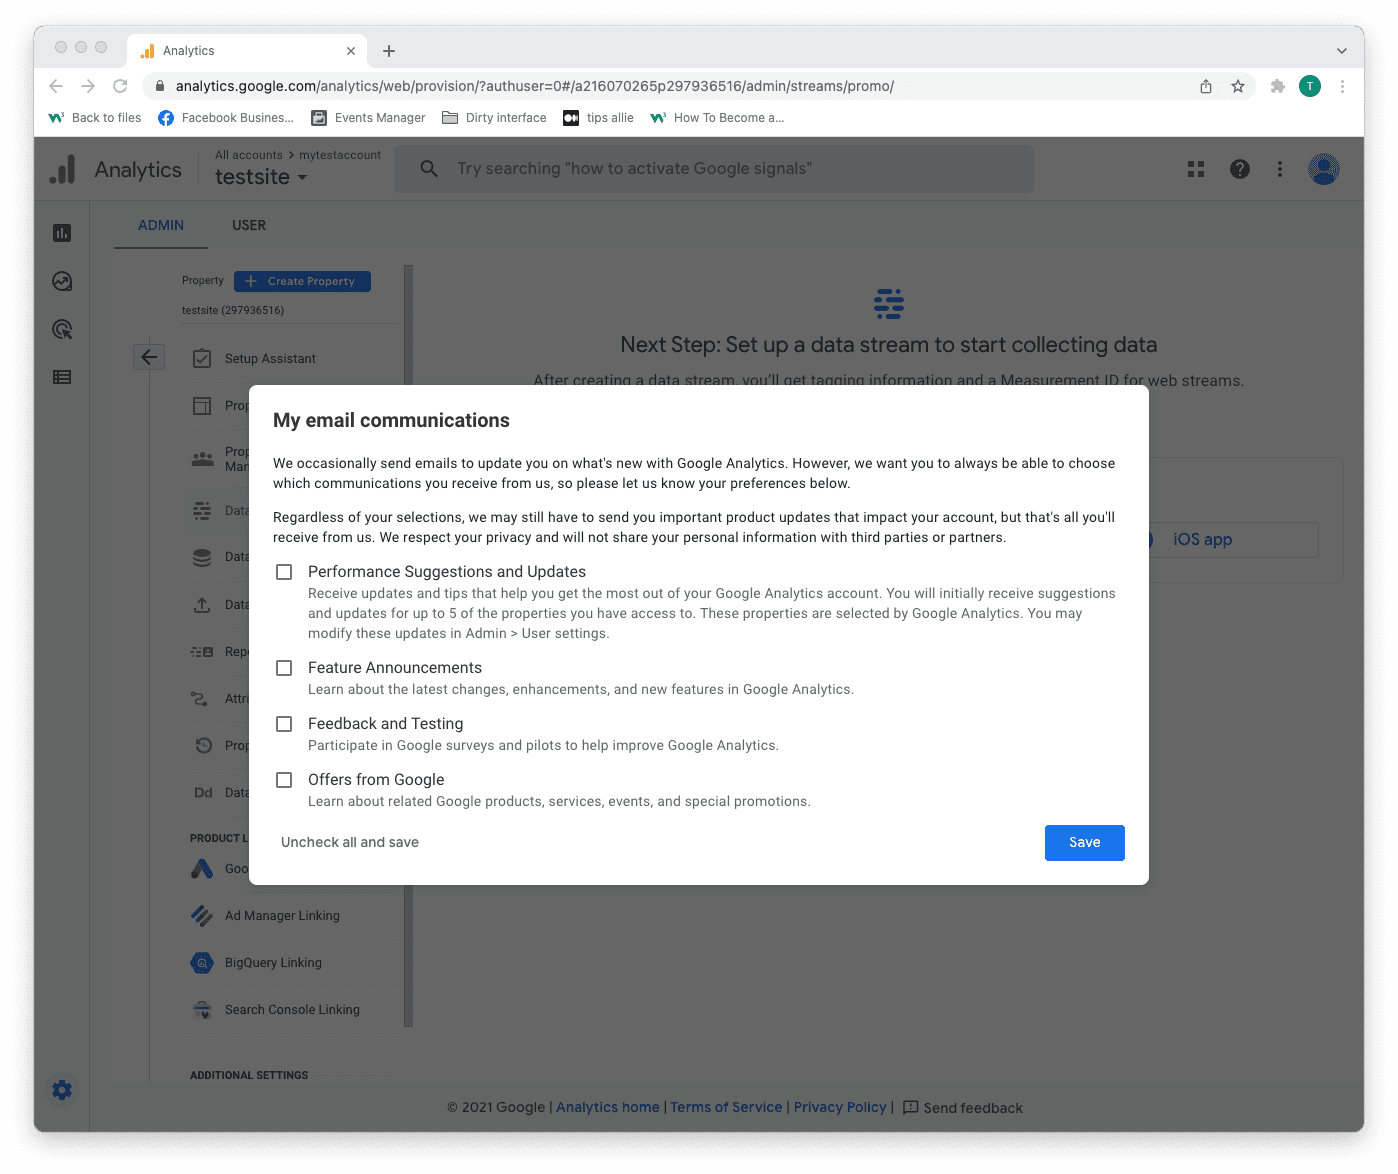
Step 7: Email subscriptions
- Tick or uncheck all boxes.
- Click the "Save" button to continue.
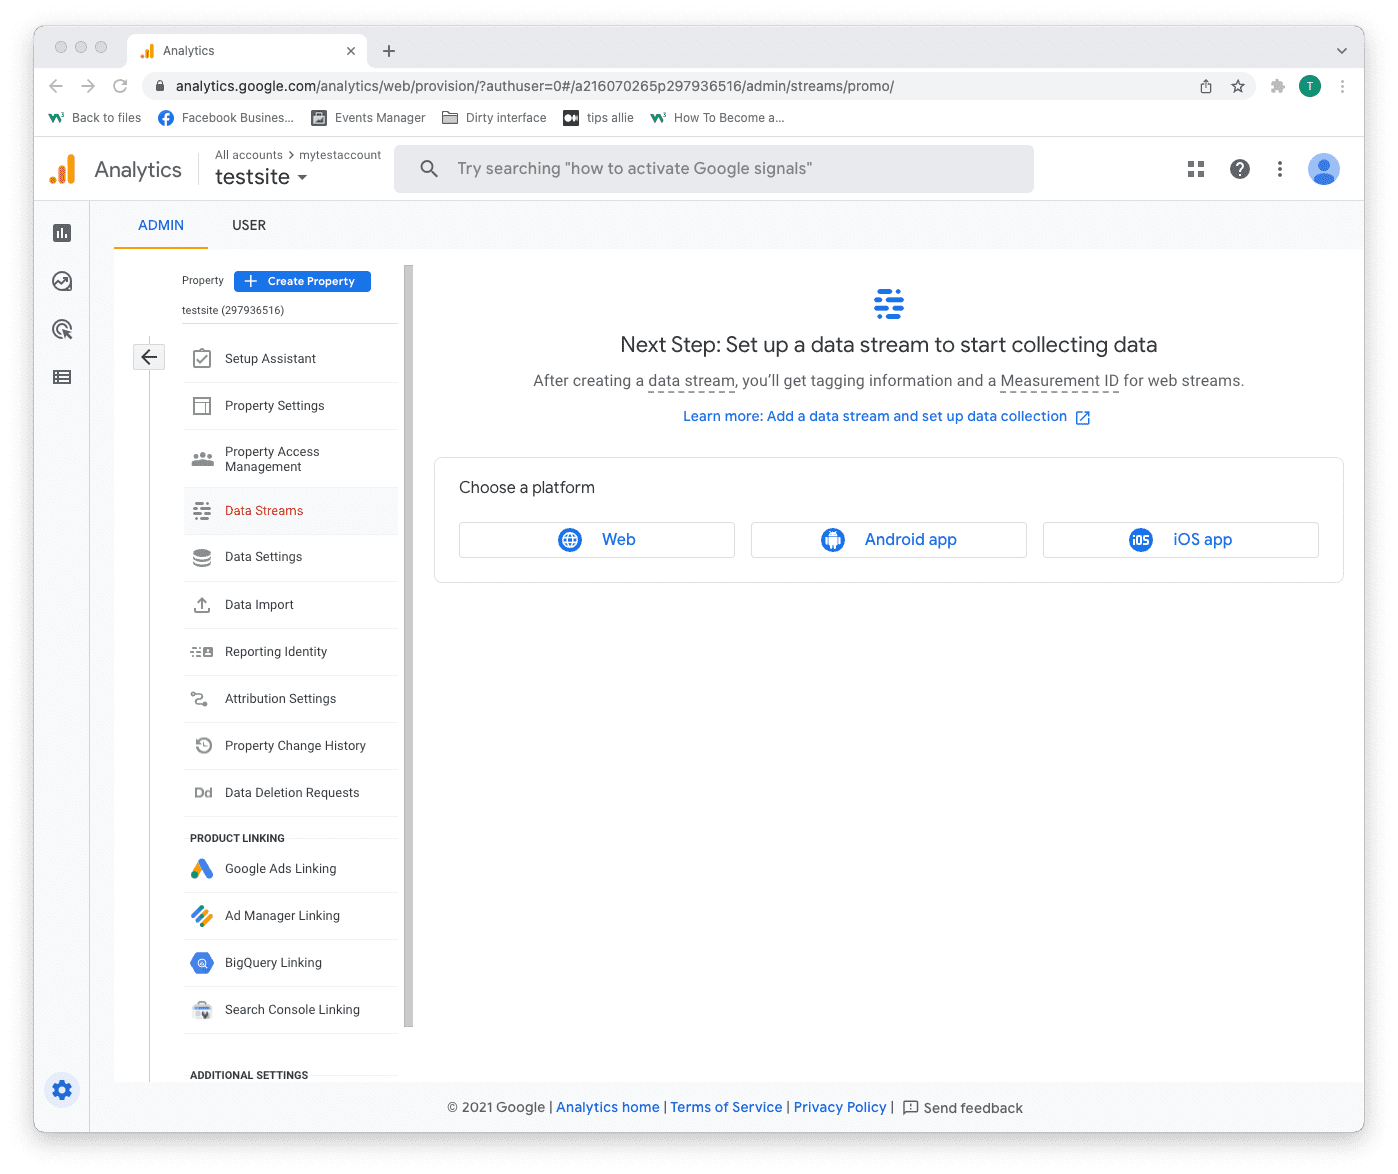
Step 8: Select platform
Chose the platform where you are collecting data.
Then, click the relevant platform to continue.
We are continuing with "Web" as the example in this tutorial.
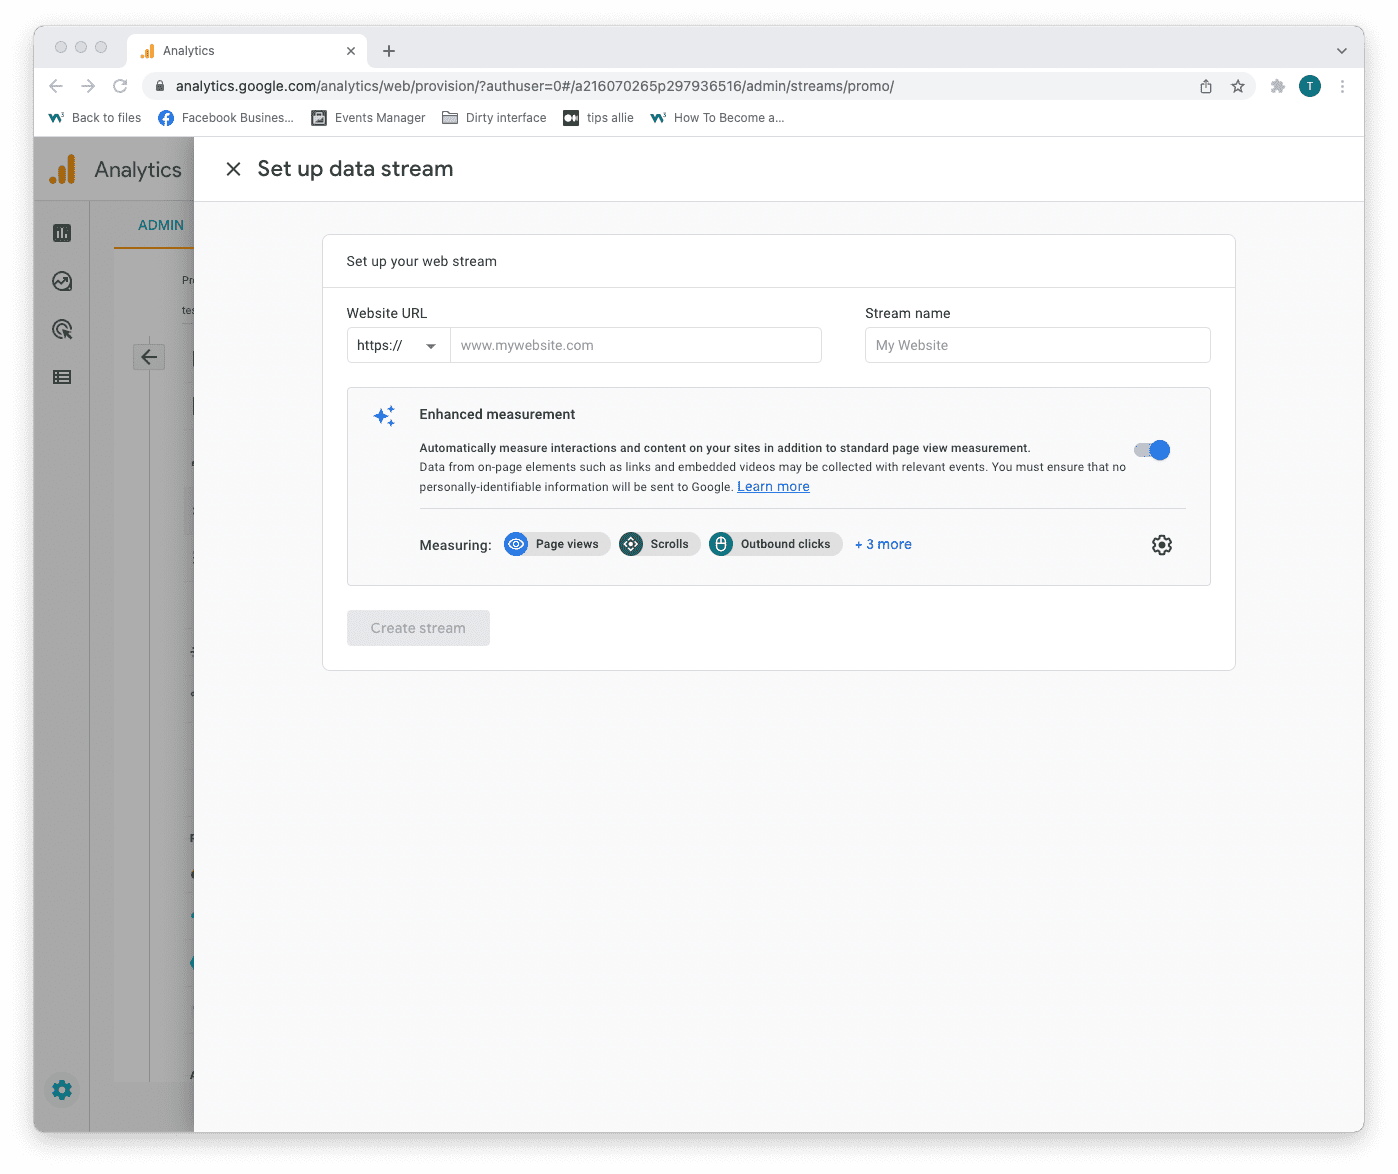
Step 9: Data stream setup
Enter data stream details.
- The URL to your site.
- The name that you want to give the stream.
- Decide if you are to enable enhanced measurement or not.
- Click on the "Create stream" button to continue.
The enhanced measurement can give the data more context. Improving your understanding of the traffic.
Step 10: Web stream overview
Here you can see a detailed overview of the web stream.
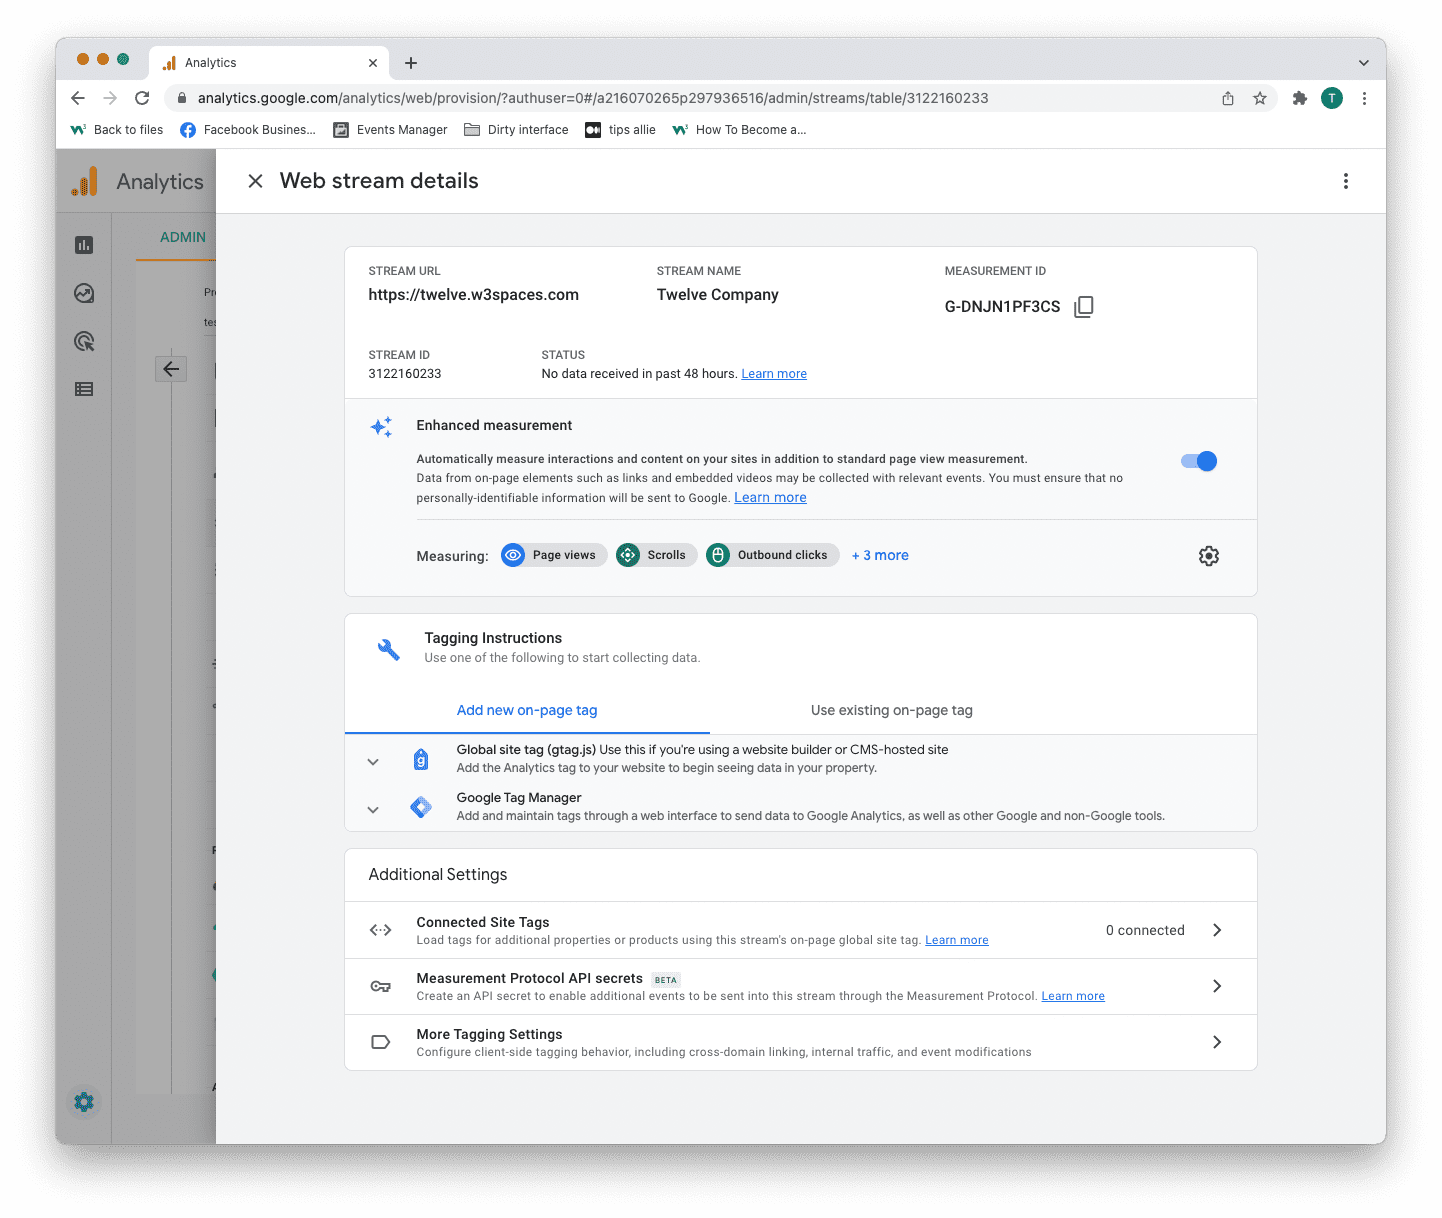
Here are the key takeaways from the overview.
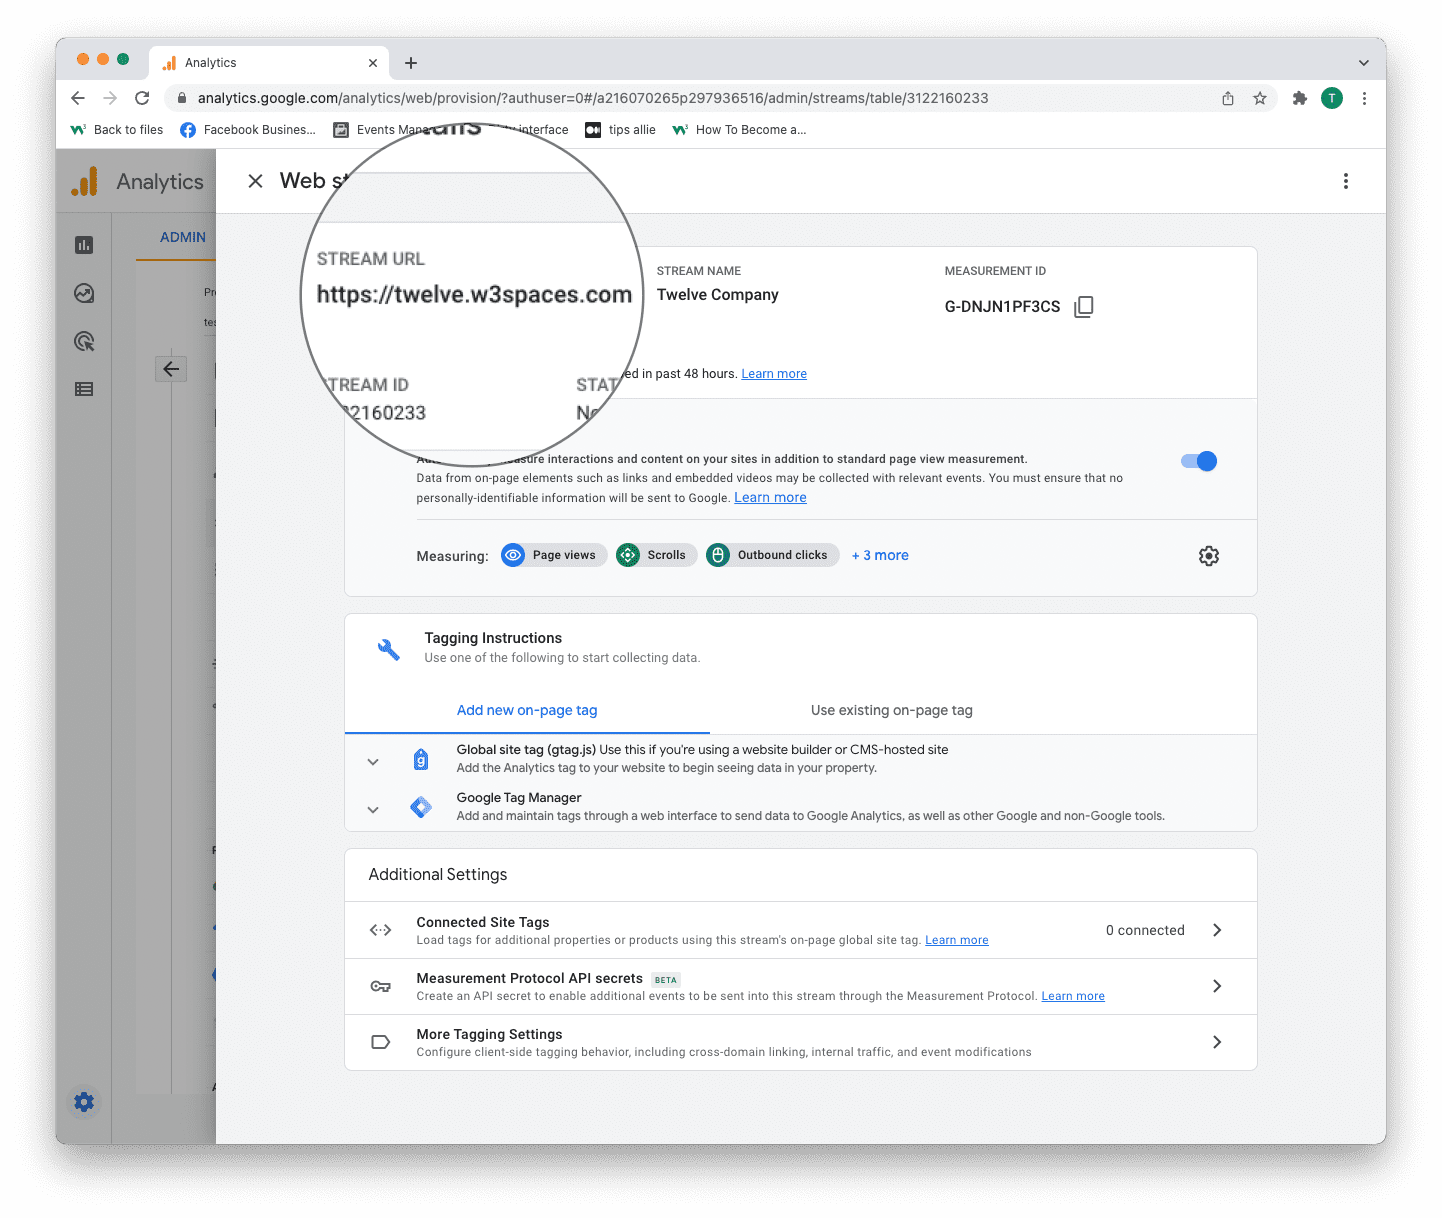
1. Stream URL.
The Stream URL is the link to the connected site.
2. Measurement ID
The Measurement ID is the identifier for your data stream.
It has a format of G-XXXXXXX.
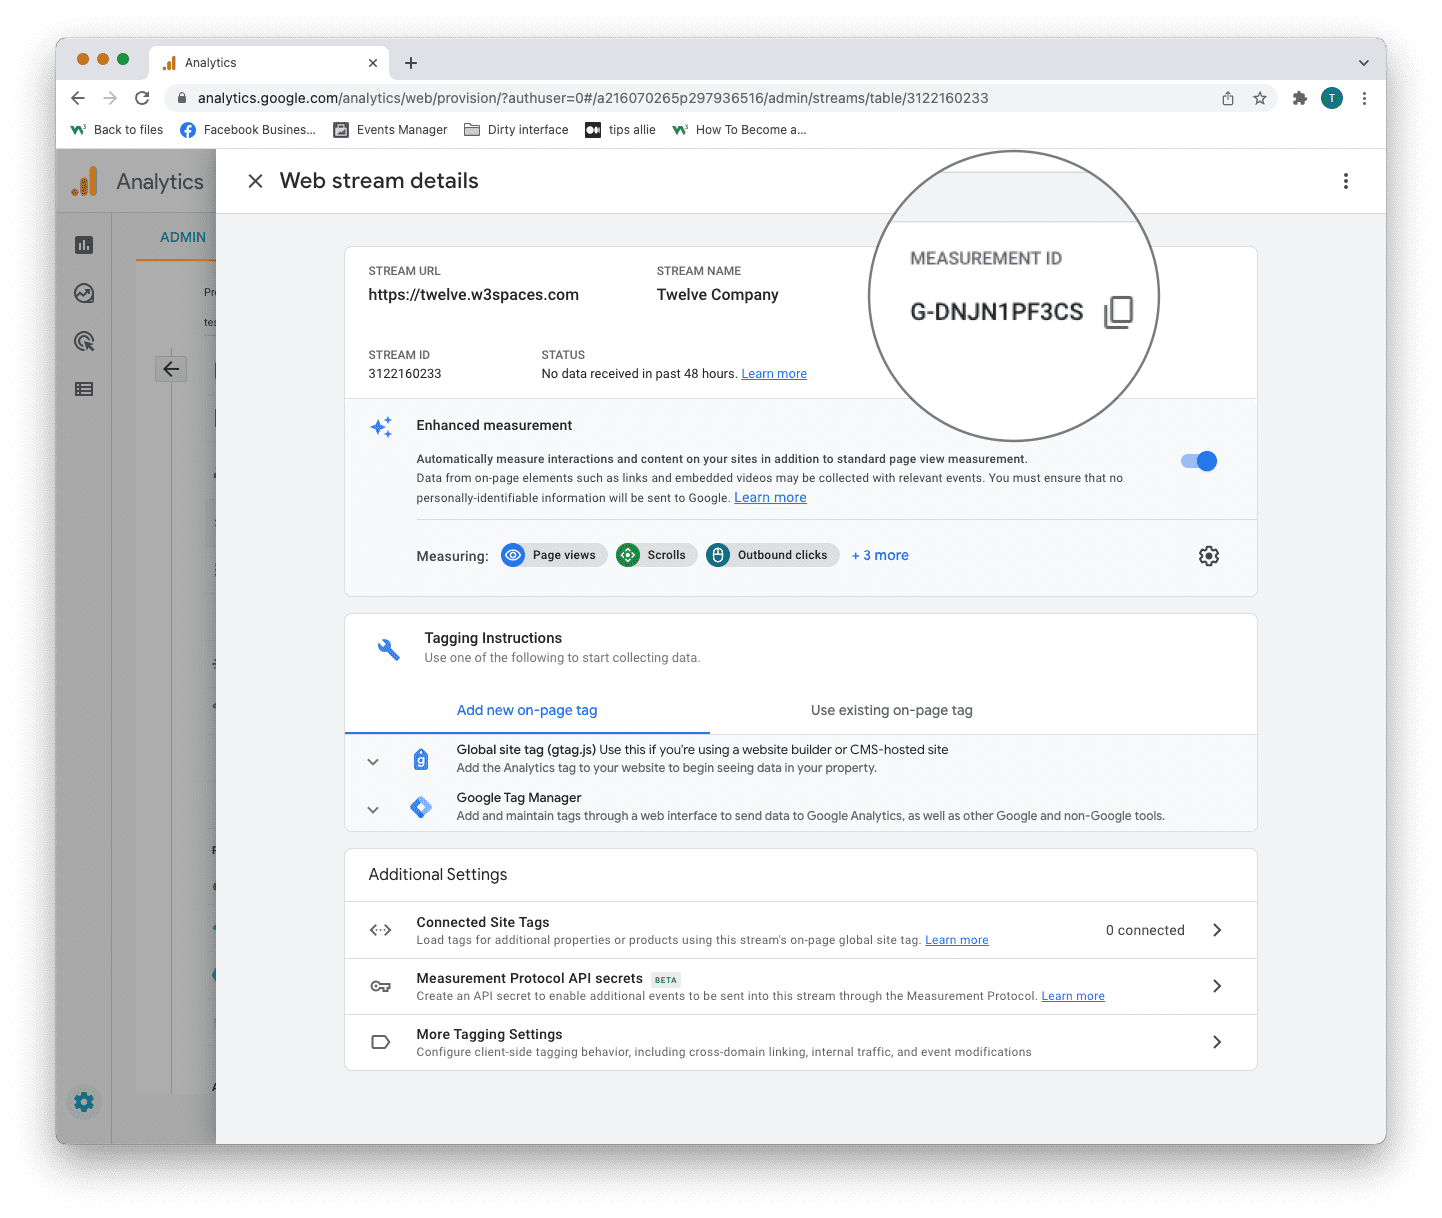
Google Analytics 4 uses Measurement ID. Older versions use Tracking ID. You can not have both.
3. Tagging instructions
Decide to use Global site tag (gtag.js) or Tag manager.
This tutorial will use the Global site tag.
Installing the Global site tag is the easiest and quickest way of getting it up and running.
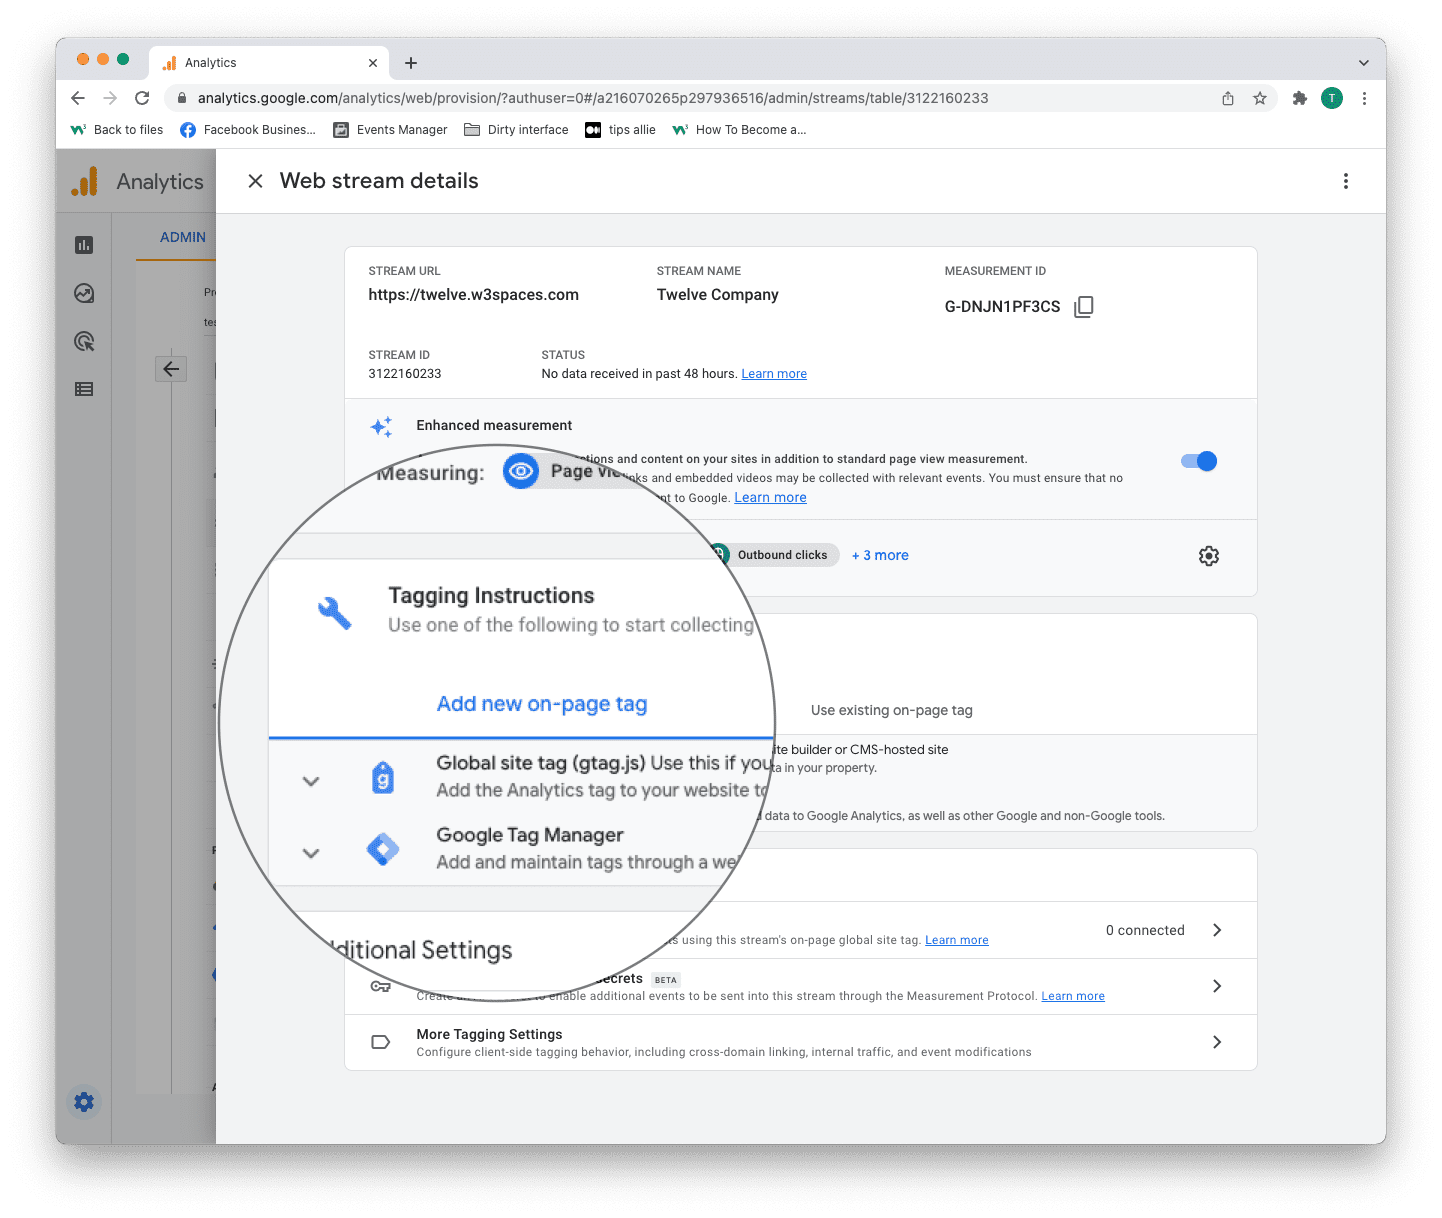
Step 11: Global site tag (gtag.js)
Click the "Global site tag (gtag.js)" row.
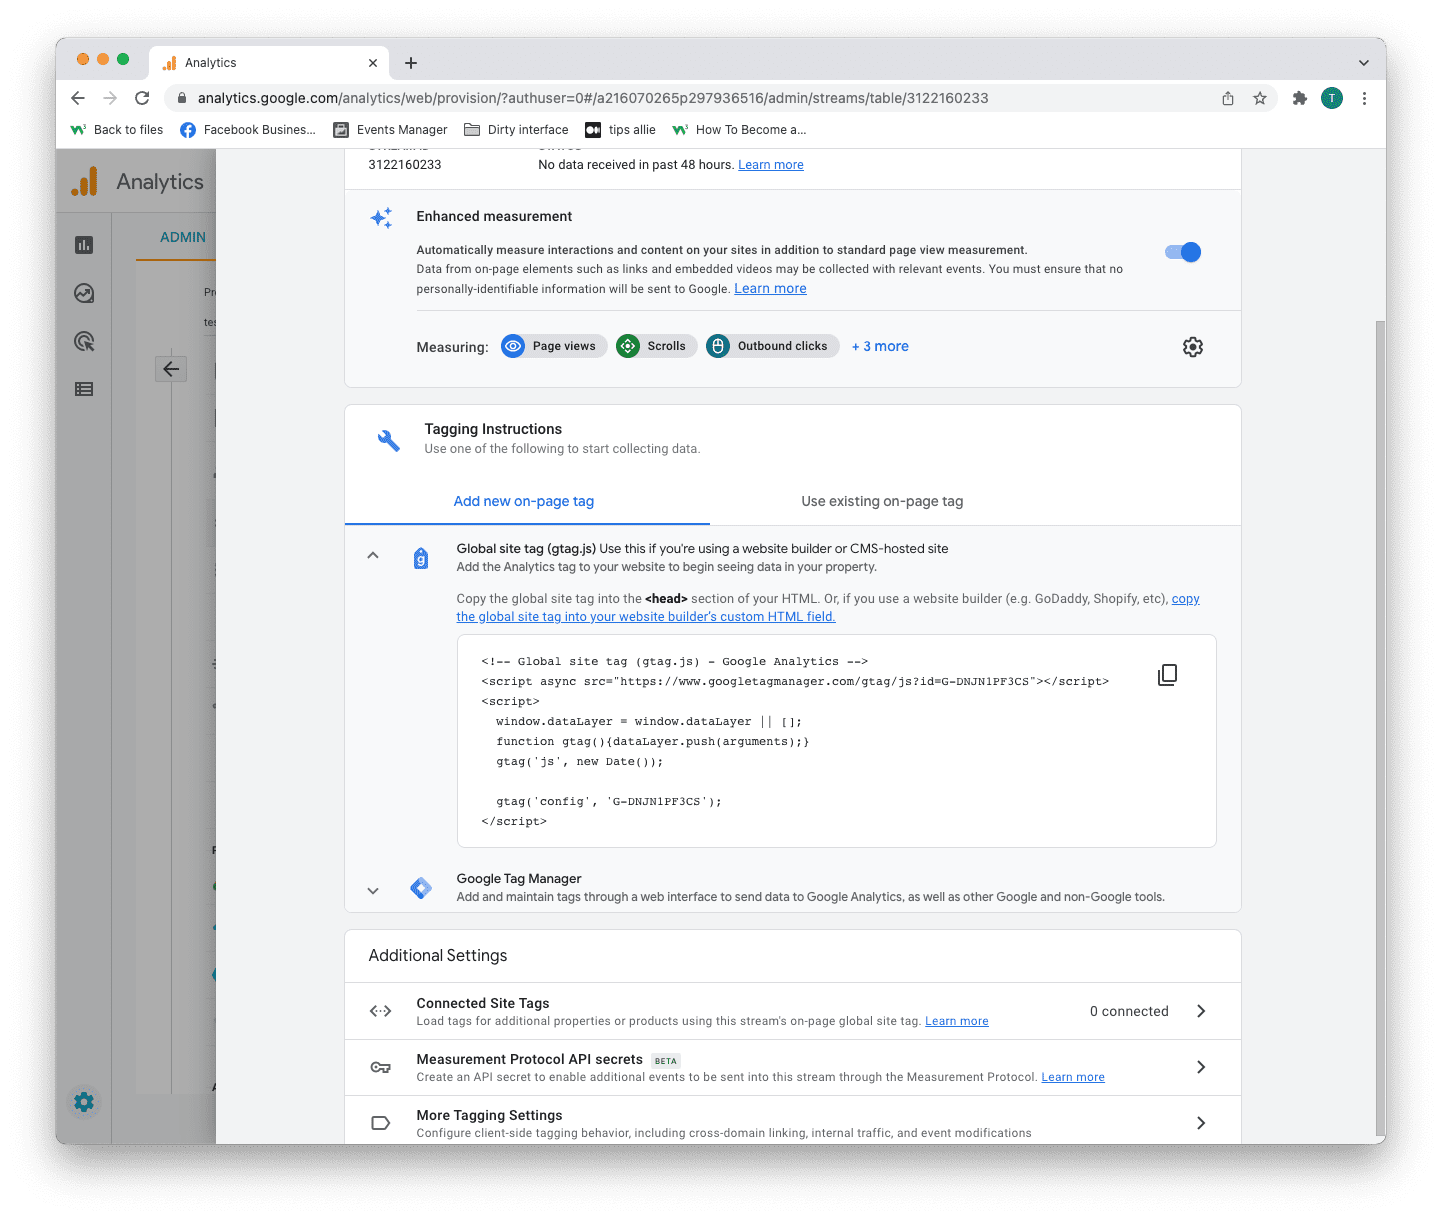
Here you can see a code snippet.
The code snippet is a script to allow Google to measure data on your site.
You can see the Measurement ID in the second last line in the code snippet.
The code snippet
<!-- Global site tag (gtag.js) - Google Analytics -->
<script async src="https://www.googletagmanager.com/gtag/js?id=G-DNJN1PF3CS"></script>
<script>
window.dataLayer = window.dataLayer || [];
function gtag(){dataLayer.push(arguments);}
gtag('js', new Date());
gtag('config', 'G-XXXXXXX');
</script>
Step 12: Enter the code snippet
Copy the code snippet.
Make sure to include your Measurement ID.
Locate the <head> tag in your HTML.
Paste the code snippet just below the <head> tag.
Save and publish the code.
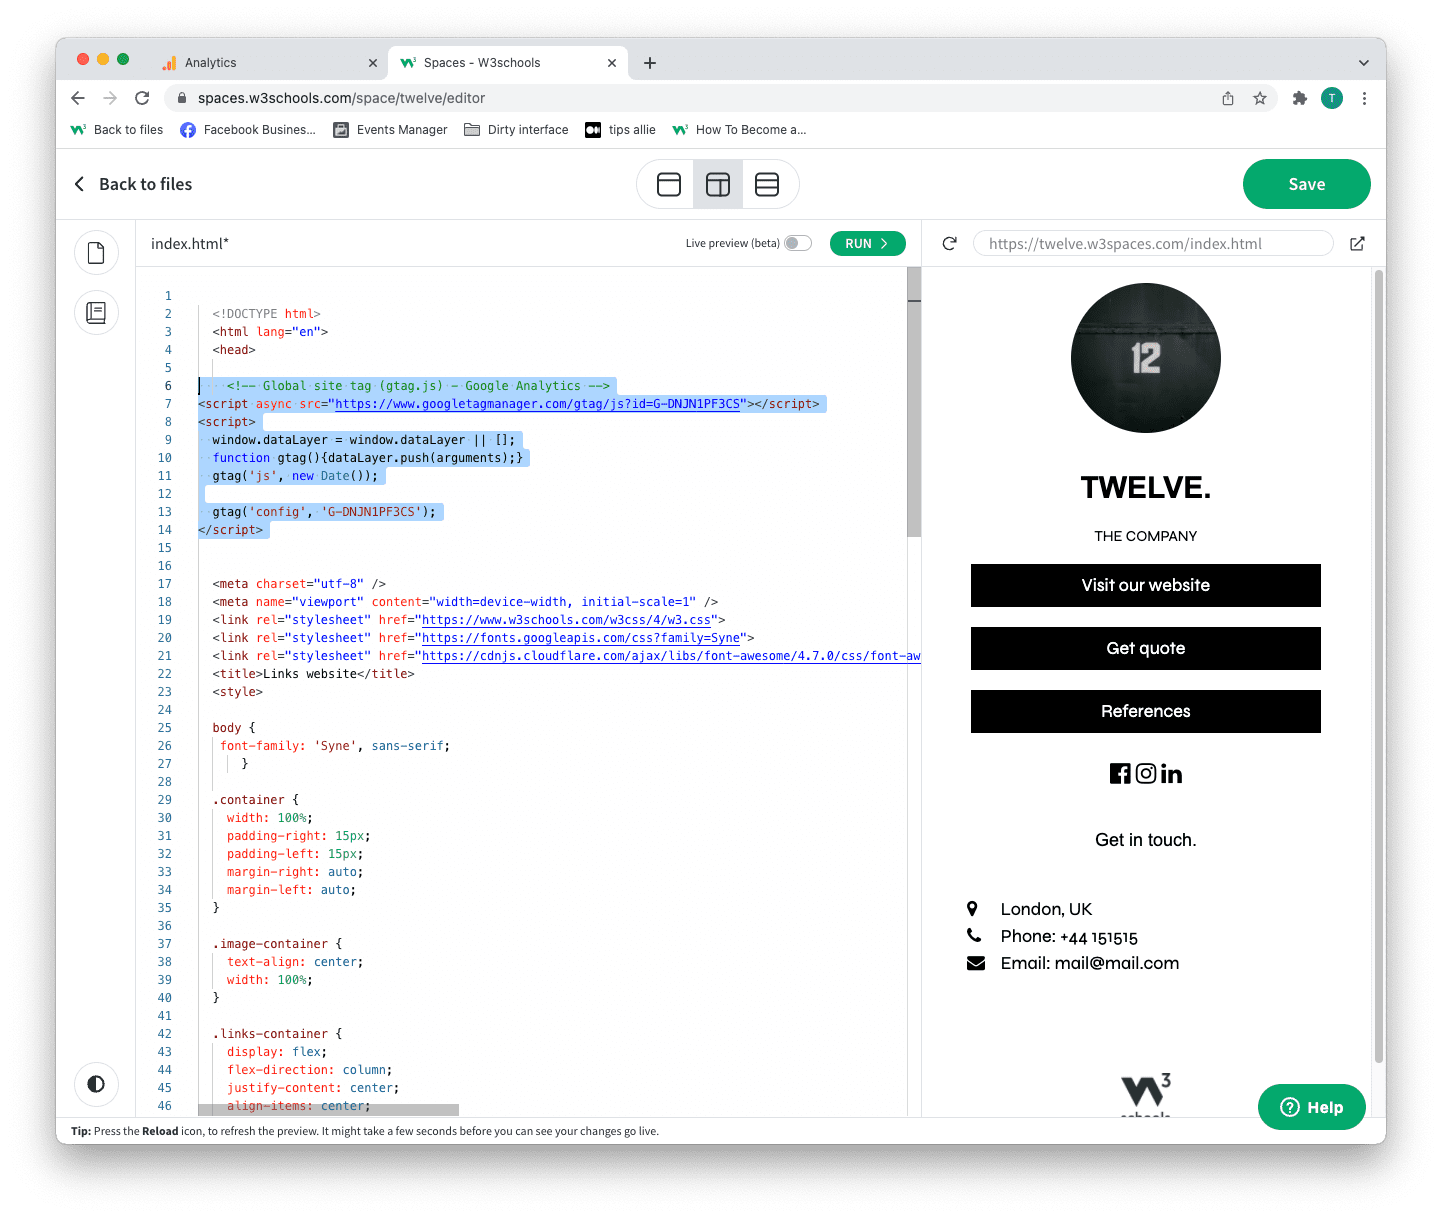
We used W3Schools Spaces in this example.
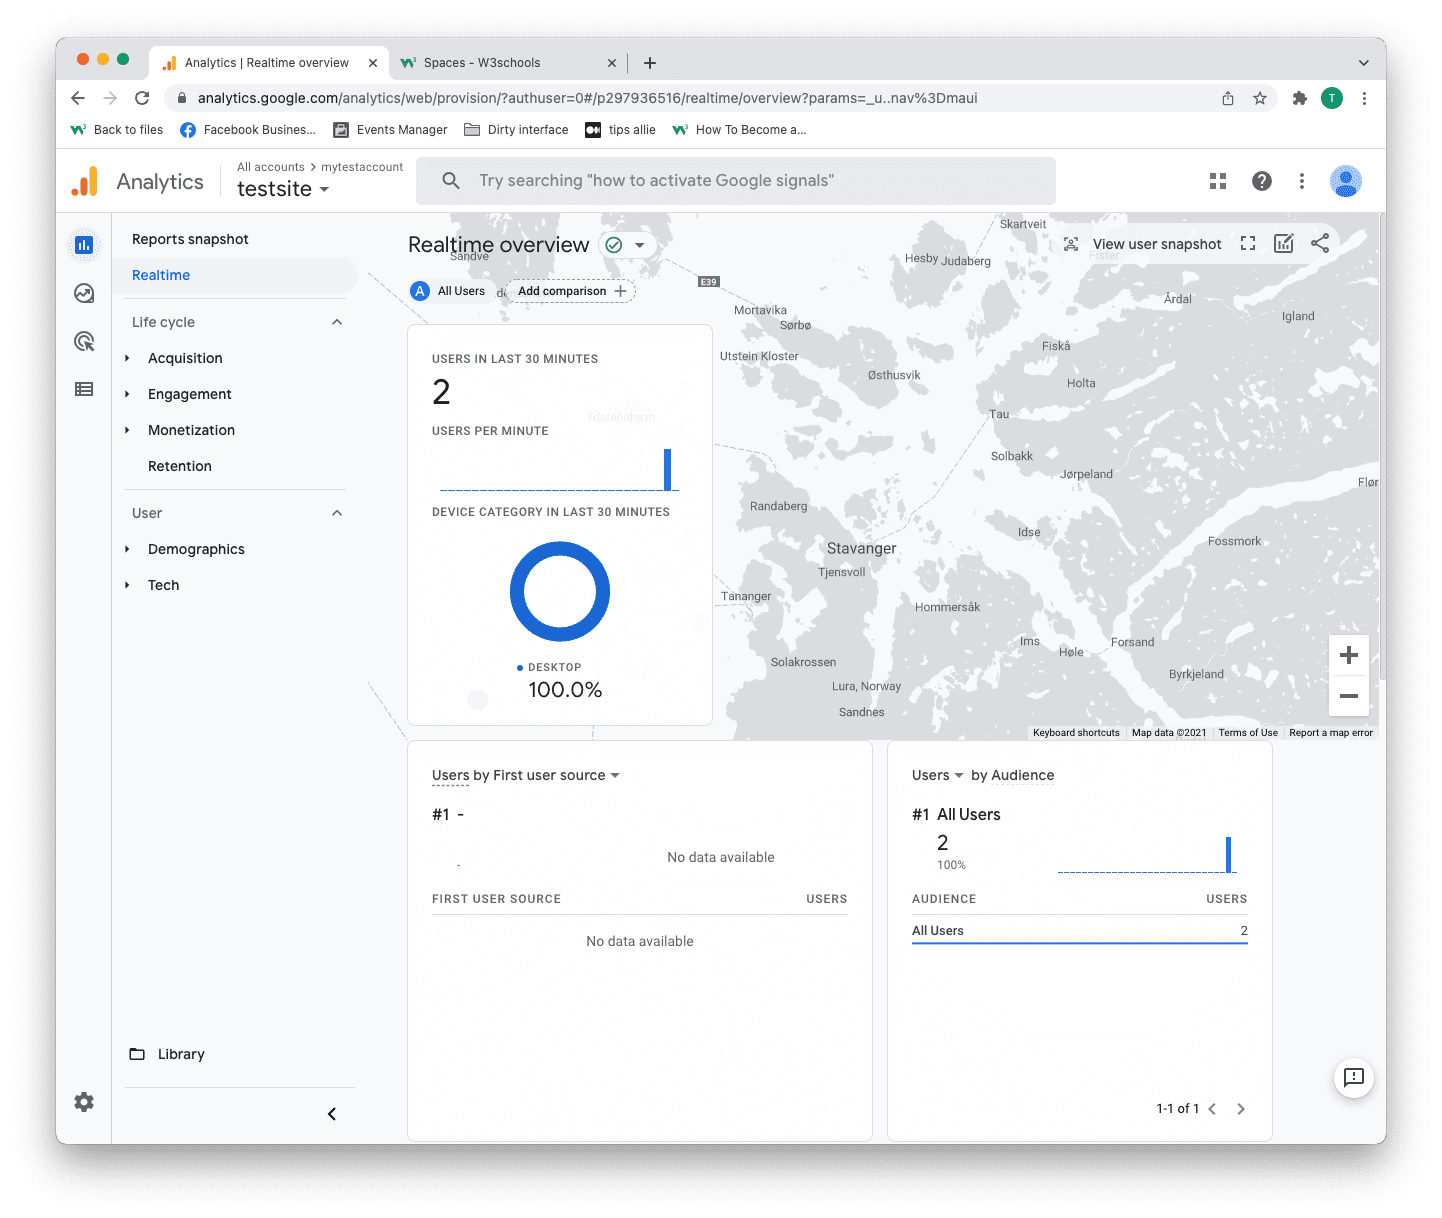
Step 13: Test that it works
Ensure that you have successfully saved and published the code snippet with the correct Measurement ID.
Open the URL for the site you have connected to the data stream.
Click on "Real time" on the menu to the left.
Confirm that you see yourself as an active user.
Congrats. You have successfully enabled Google Analytics for your site!
Explore Google Analytics
Recommended related topics are Tag manager and Events
Spend time in the service to learn about your user activity, commerce, demographics, device, and referrals.
Tip: Ever heard of W3Schools Spaces? It is a personal space where you can make a website from scratch or use a template and host it for free.
It has everything you need in the browser.
Get started in a few clicks.
Start now for free ❯* no credit card required